Import Panel
The Import Panel allows you to import data into your database from CSV or Parquet files via the UI. You can create new node/relationship or import data into existing tables via the imported files. To get started, click on the “Import” tab on the top right.
File sniffing
You can load files from your local system with the widget available in the import panel. The primary requirement is that the files be organized into node and relationship files. Node files are files that contain data for nodes, and relationship files are files that contain data for relationships. See the documentation on importing from files to learn about the structure of node and relationship files. The supported formats for import are CSV and Parquet.
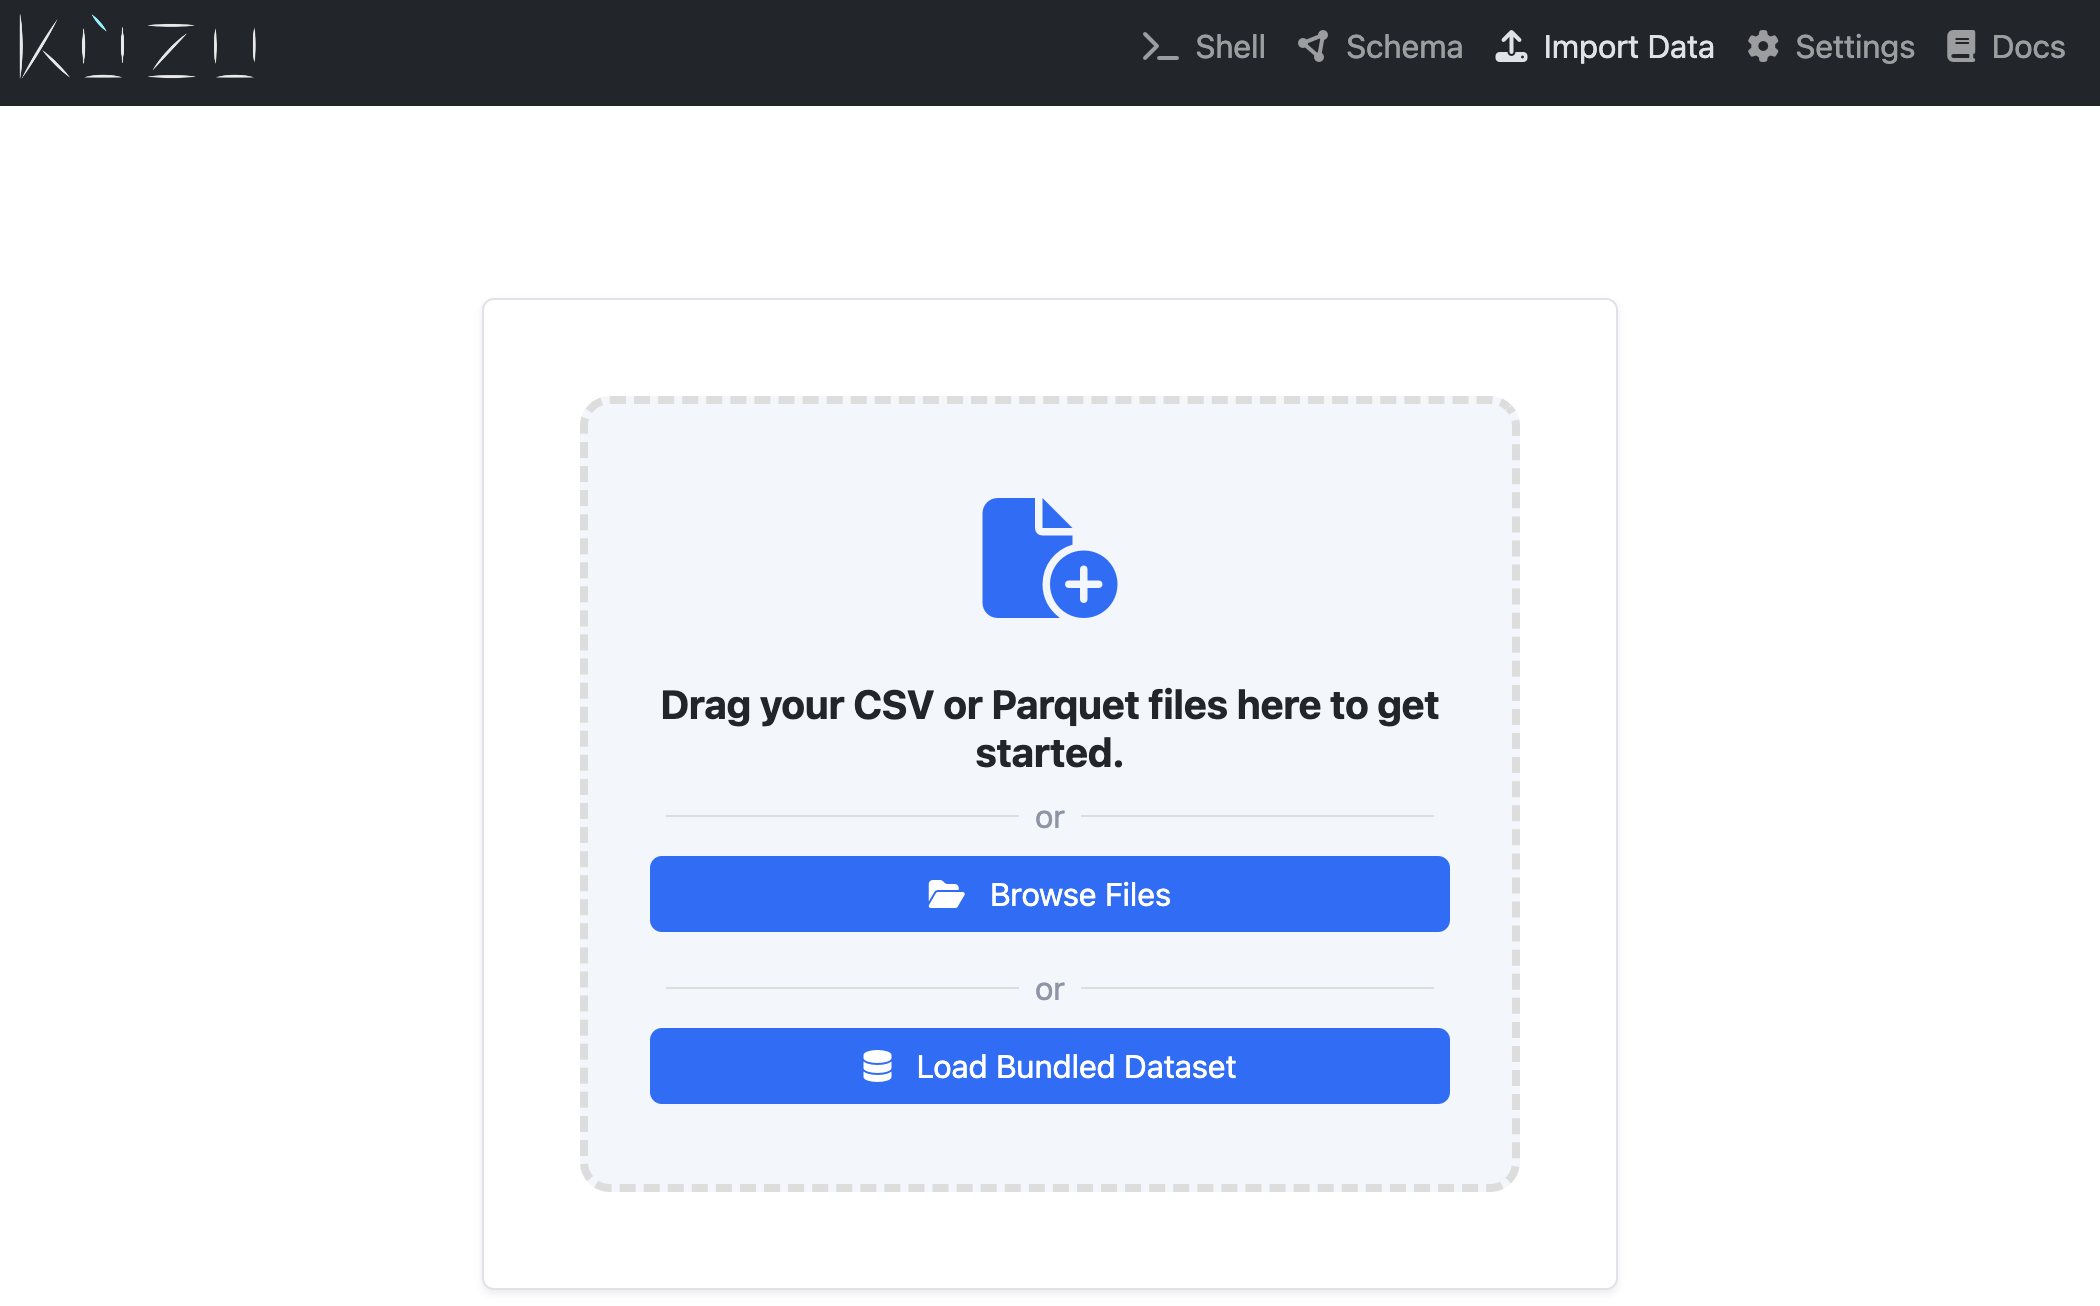
Either drag-drop your desired files into the drop zone, or click “Browse Files” to multi-select files from your local file system. When you load the files, they will be “sniffed” (i.e., their headers parsed and the their overall structure validated). Once file sniffing is successful, you will be taken to the file setup page, that looks like the following:
File setup
Header detection
Whenever possible, header information in files is automatically detected and displayed in the UI. For Parquet files, this is not an issue as they contain header and data type information implicitly. For CSV files, the first row of a file is assumed to be the header row.
If your CSV file doesn’t contain a header row, Kuzu cannot make assumptions about your table’s column names, or, for node tables, which of the columns is the primary key column. In such cases, you will need to expand the table’s options by clicking on the downward arrow to manually specify the column names.
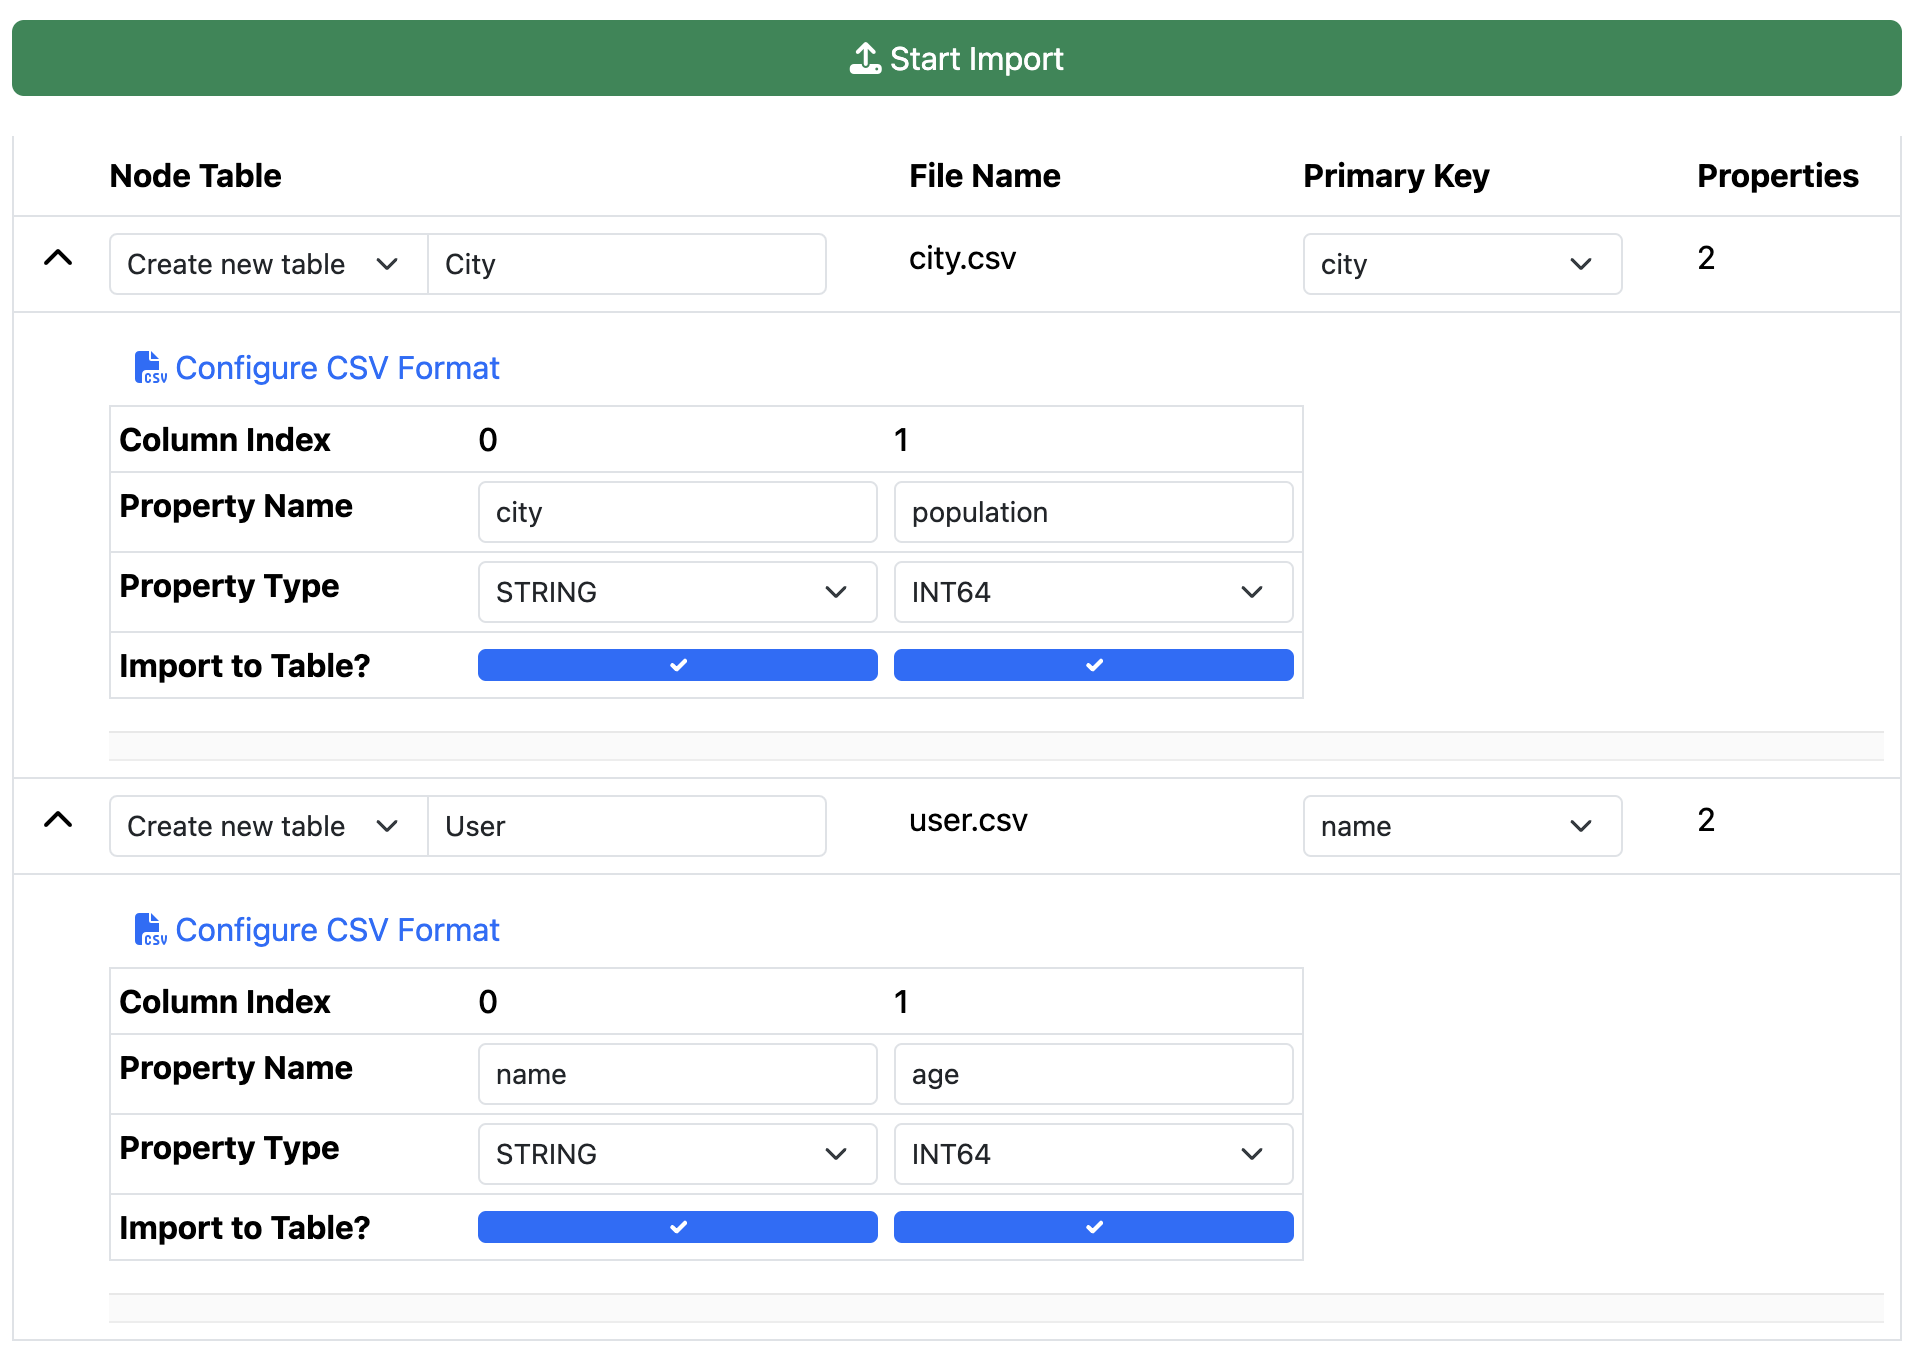
In this example, we specify the column names of the city.csv file as city and population,
and its primary key column is the city column. For the user.csv file, we specify the column names
as name and age, and the primary key column as name.
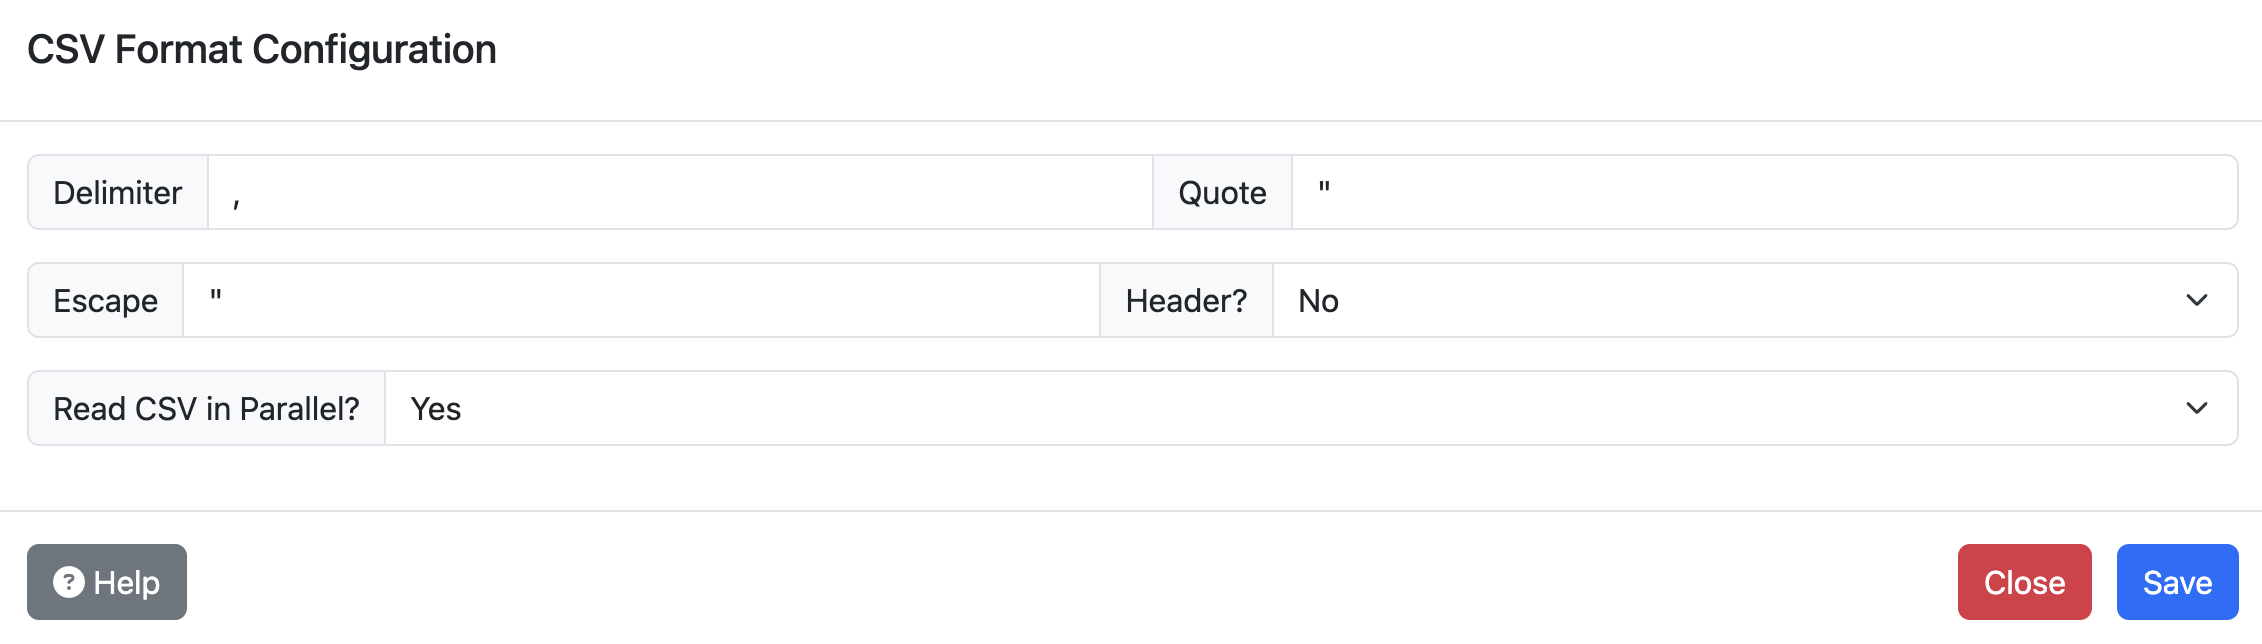
CSV import options
CSV import options can be specified, such as custom quote character, escape characters, delimiters, etc. To do this, expand the table’s options and click on “Configure CSV format”. The options are identical to those available in the CSV import section of the documentation.
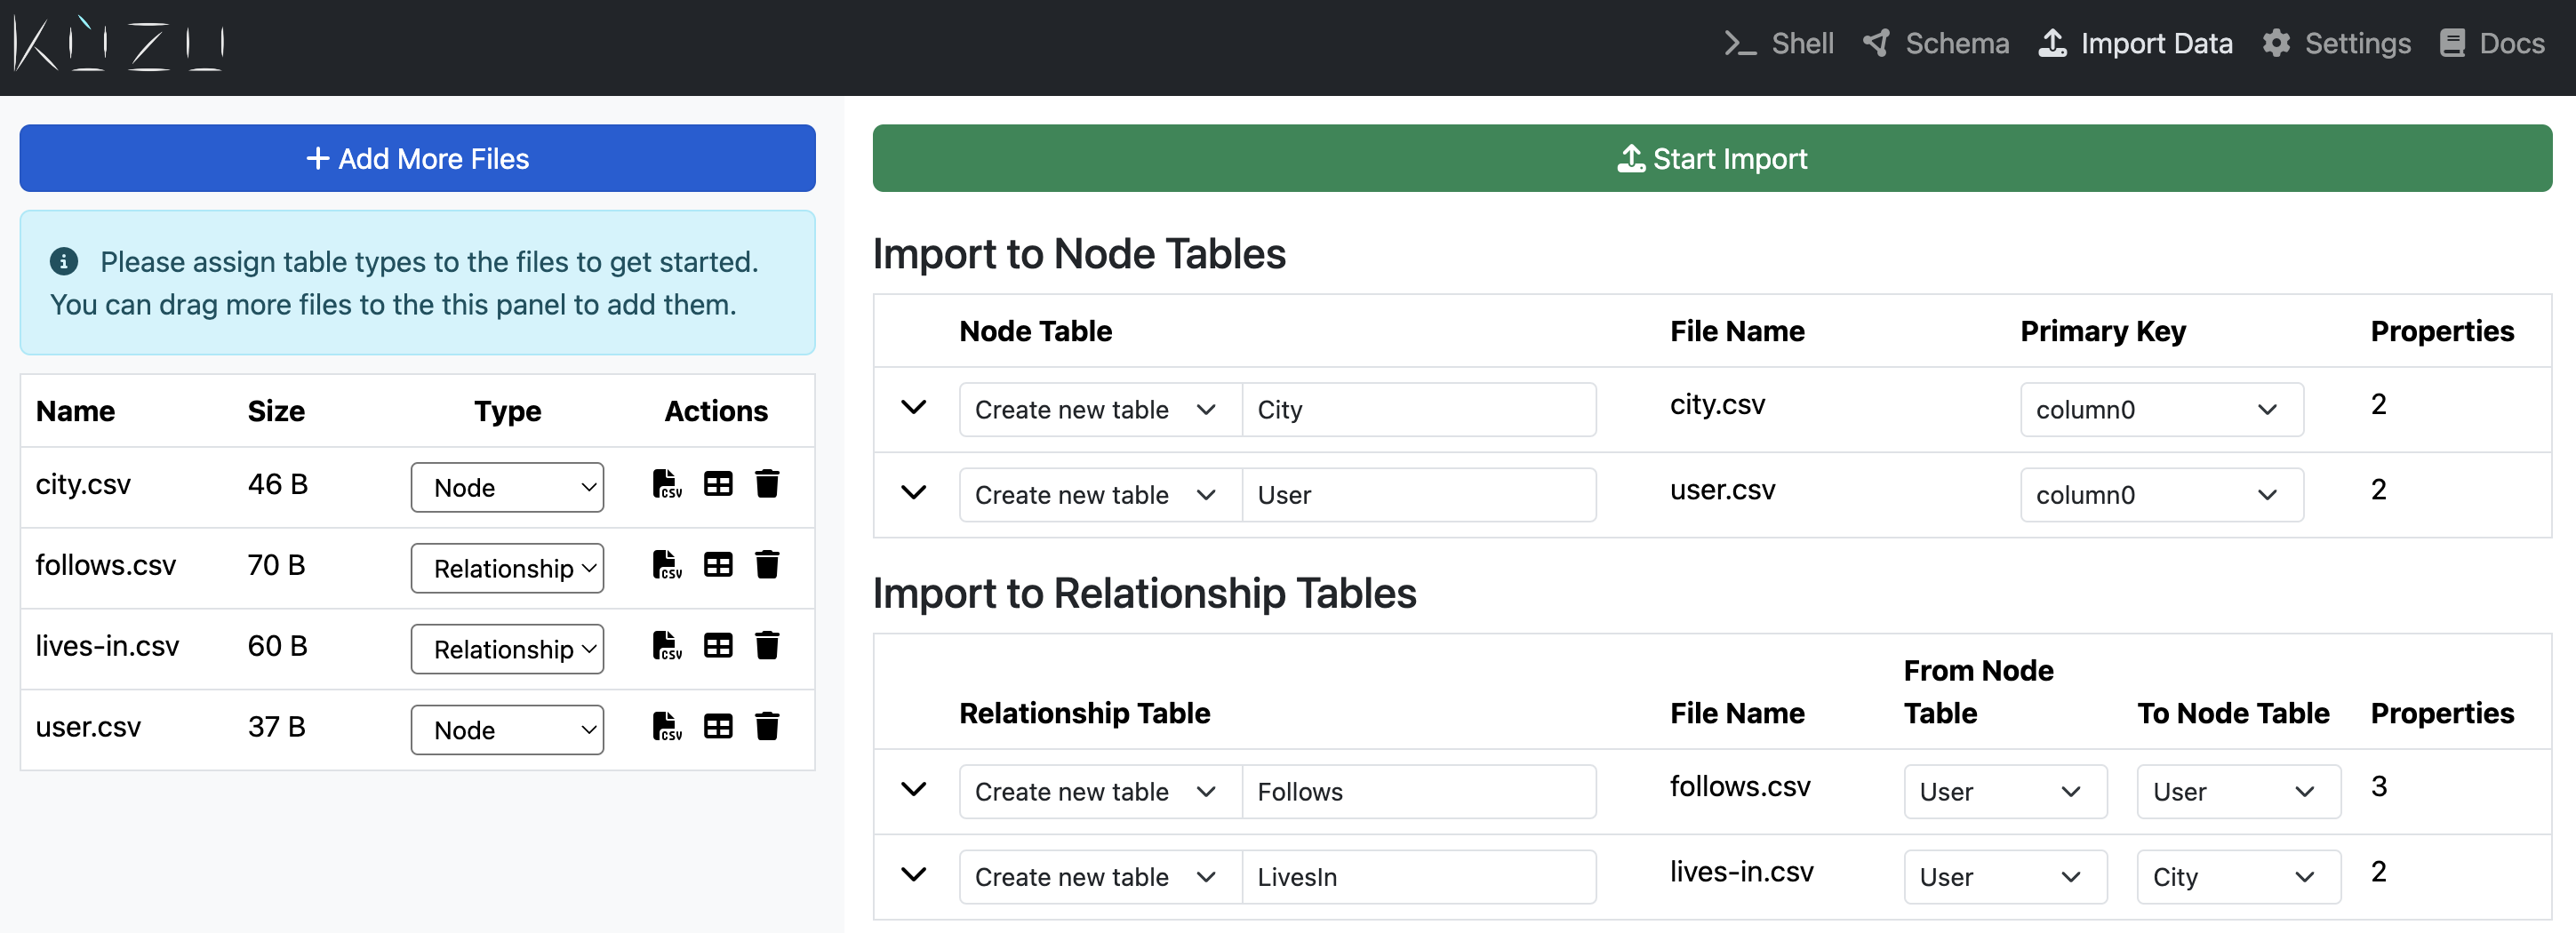
Step 1: Choose node and relationship files
The key steps in the file setup page are listed in this section. The first step is to specify which files are node files and which are relationship files. In this example, we choose the following options from the dropdown menus on the left side:
city.csv: Node fileuser.csv: Node filefollows.csv: Relationship filelives-in.csv: Relationship file
Step 2: Specify schema and import options
The schema and import options tell the importer what the structure of the data is and how to import it. The following table lists some of the options available in the schema and import options:
| Option | Type | Description |
|---|---|---|
| Create new table | Dropdown | Create a new table to import data into |
| Use existing table | Dropdown | Import data into an existing table |
| Table name | Text | Name of the table to import data into |
| Primary key | Dropdown | Column to use as the primary key for a given table |
In the example shown, we are importing all data from their respective files into new tables and setting the tables names as follows:
City: Table name of citiesUser: Table name of usersFollows: Table name of the follows relationship betweenUserandUsernodesLivesIn: Table name of the lives-in relationship betweenUserandCitynodes
The naming convention for node tables is generally to capitalize the first letter, e.g., City. For relationship tables,
it’s recommended to use capitalized words separated by underscores (e.g., LIVES_IN) or use PascalCase, for e.g., LivesIn.
This clearly separates words in a readable fashion. The naming convention you follow is totally up to
you, but it’s recommended to be consistent in your naming across all database tables.
Data import
Begin the import by clicking the “Start Import” button on the top of the UI. This will first display a summary of all the tables that are going to be copied into the database. Click on the “Execute” button to confirm execution.
Upon success, this will look as follows:
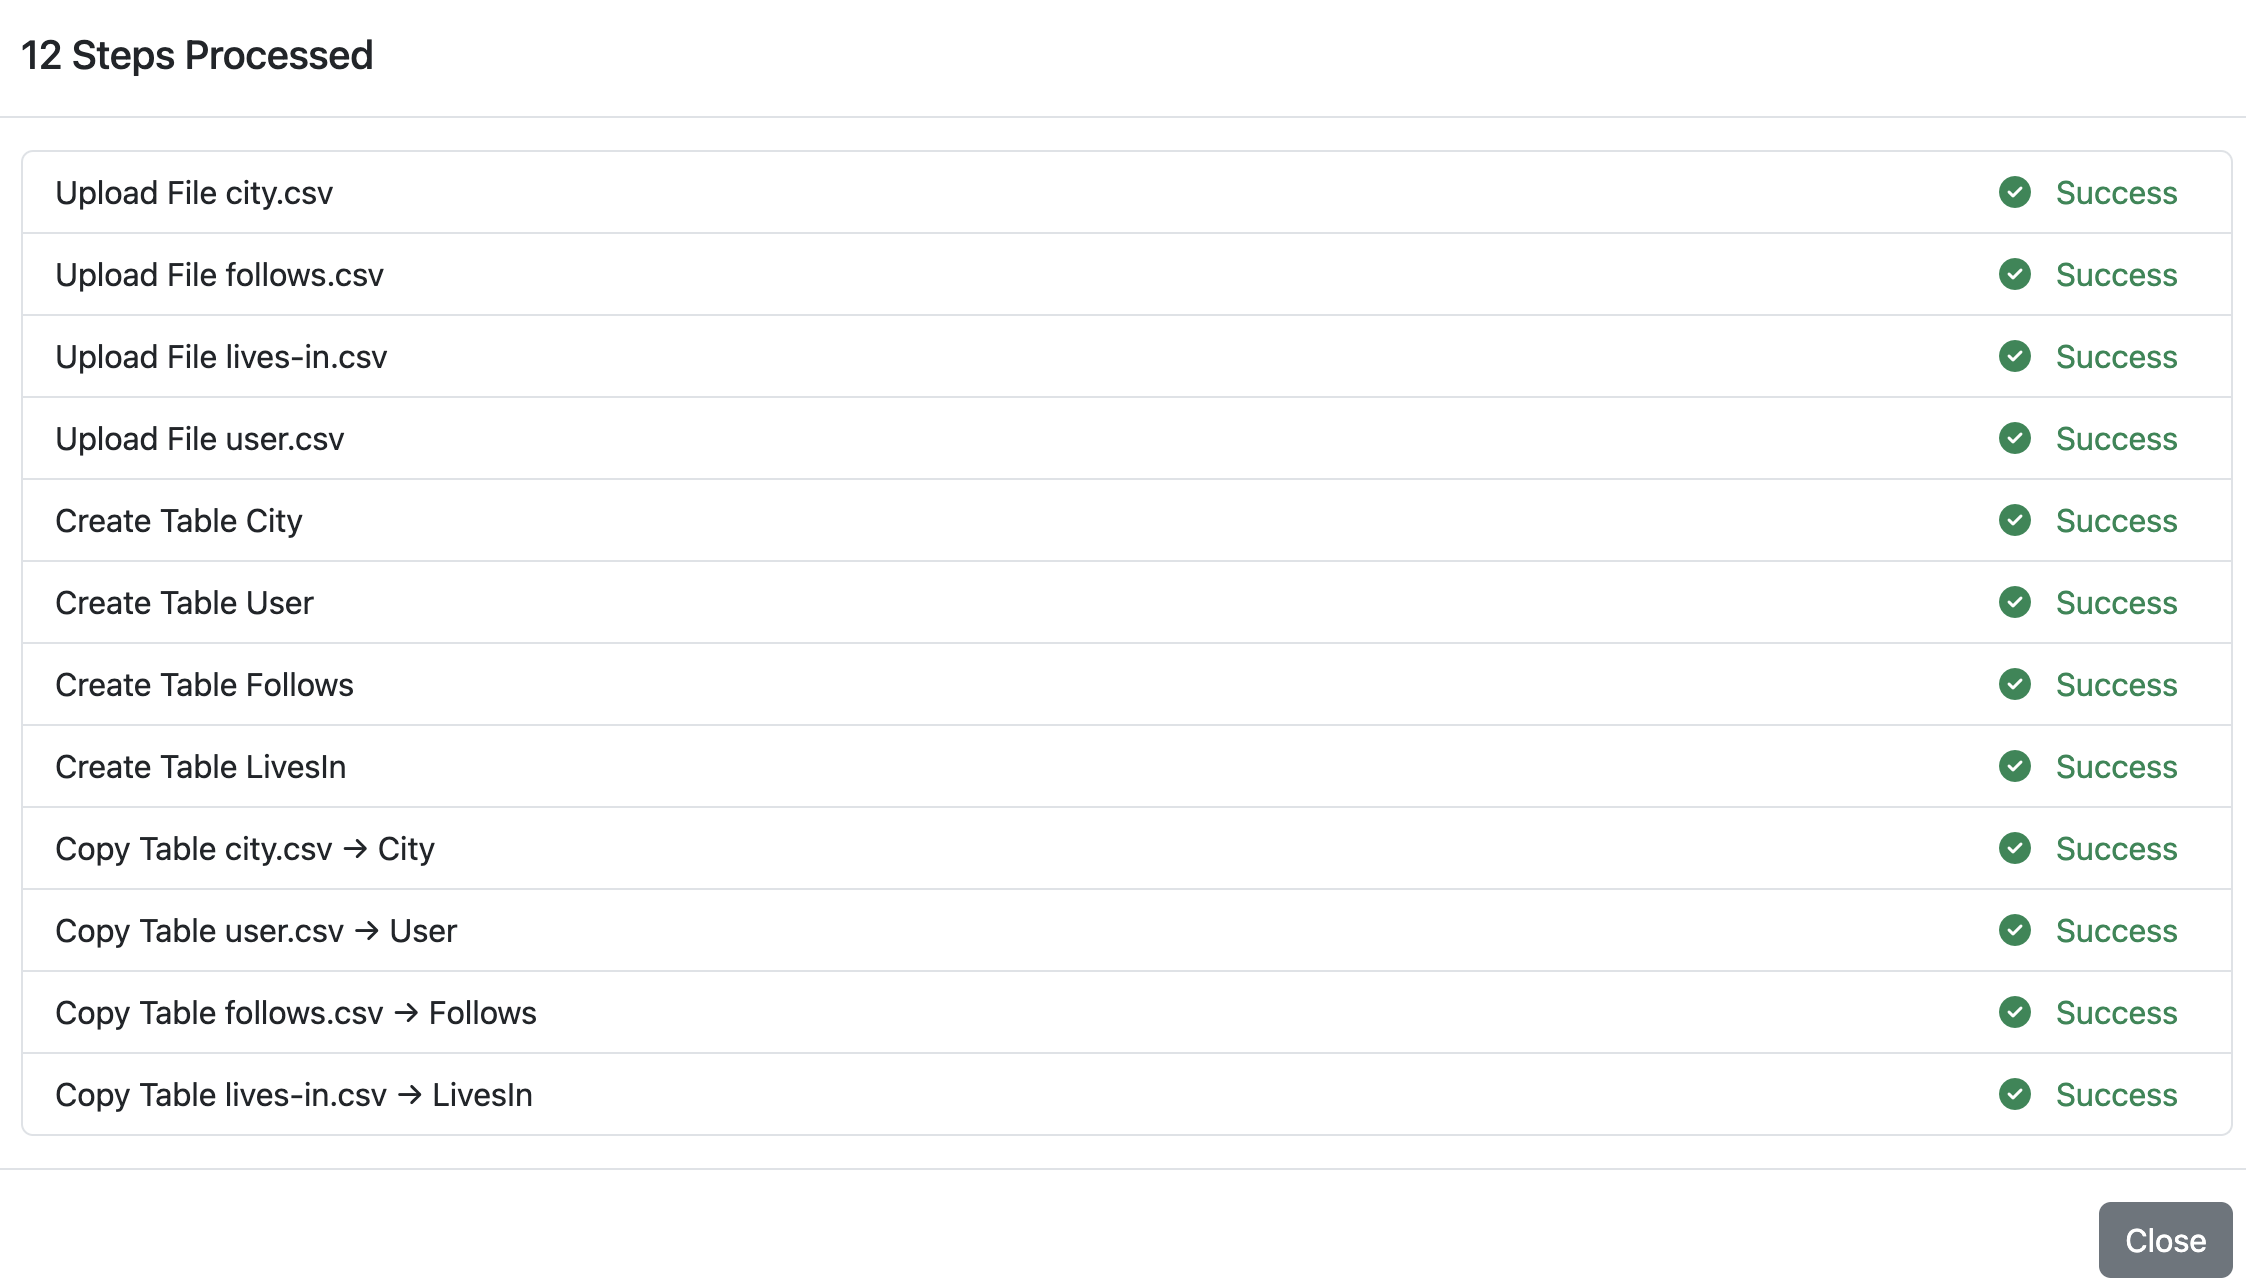
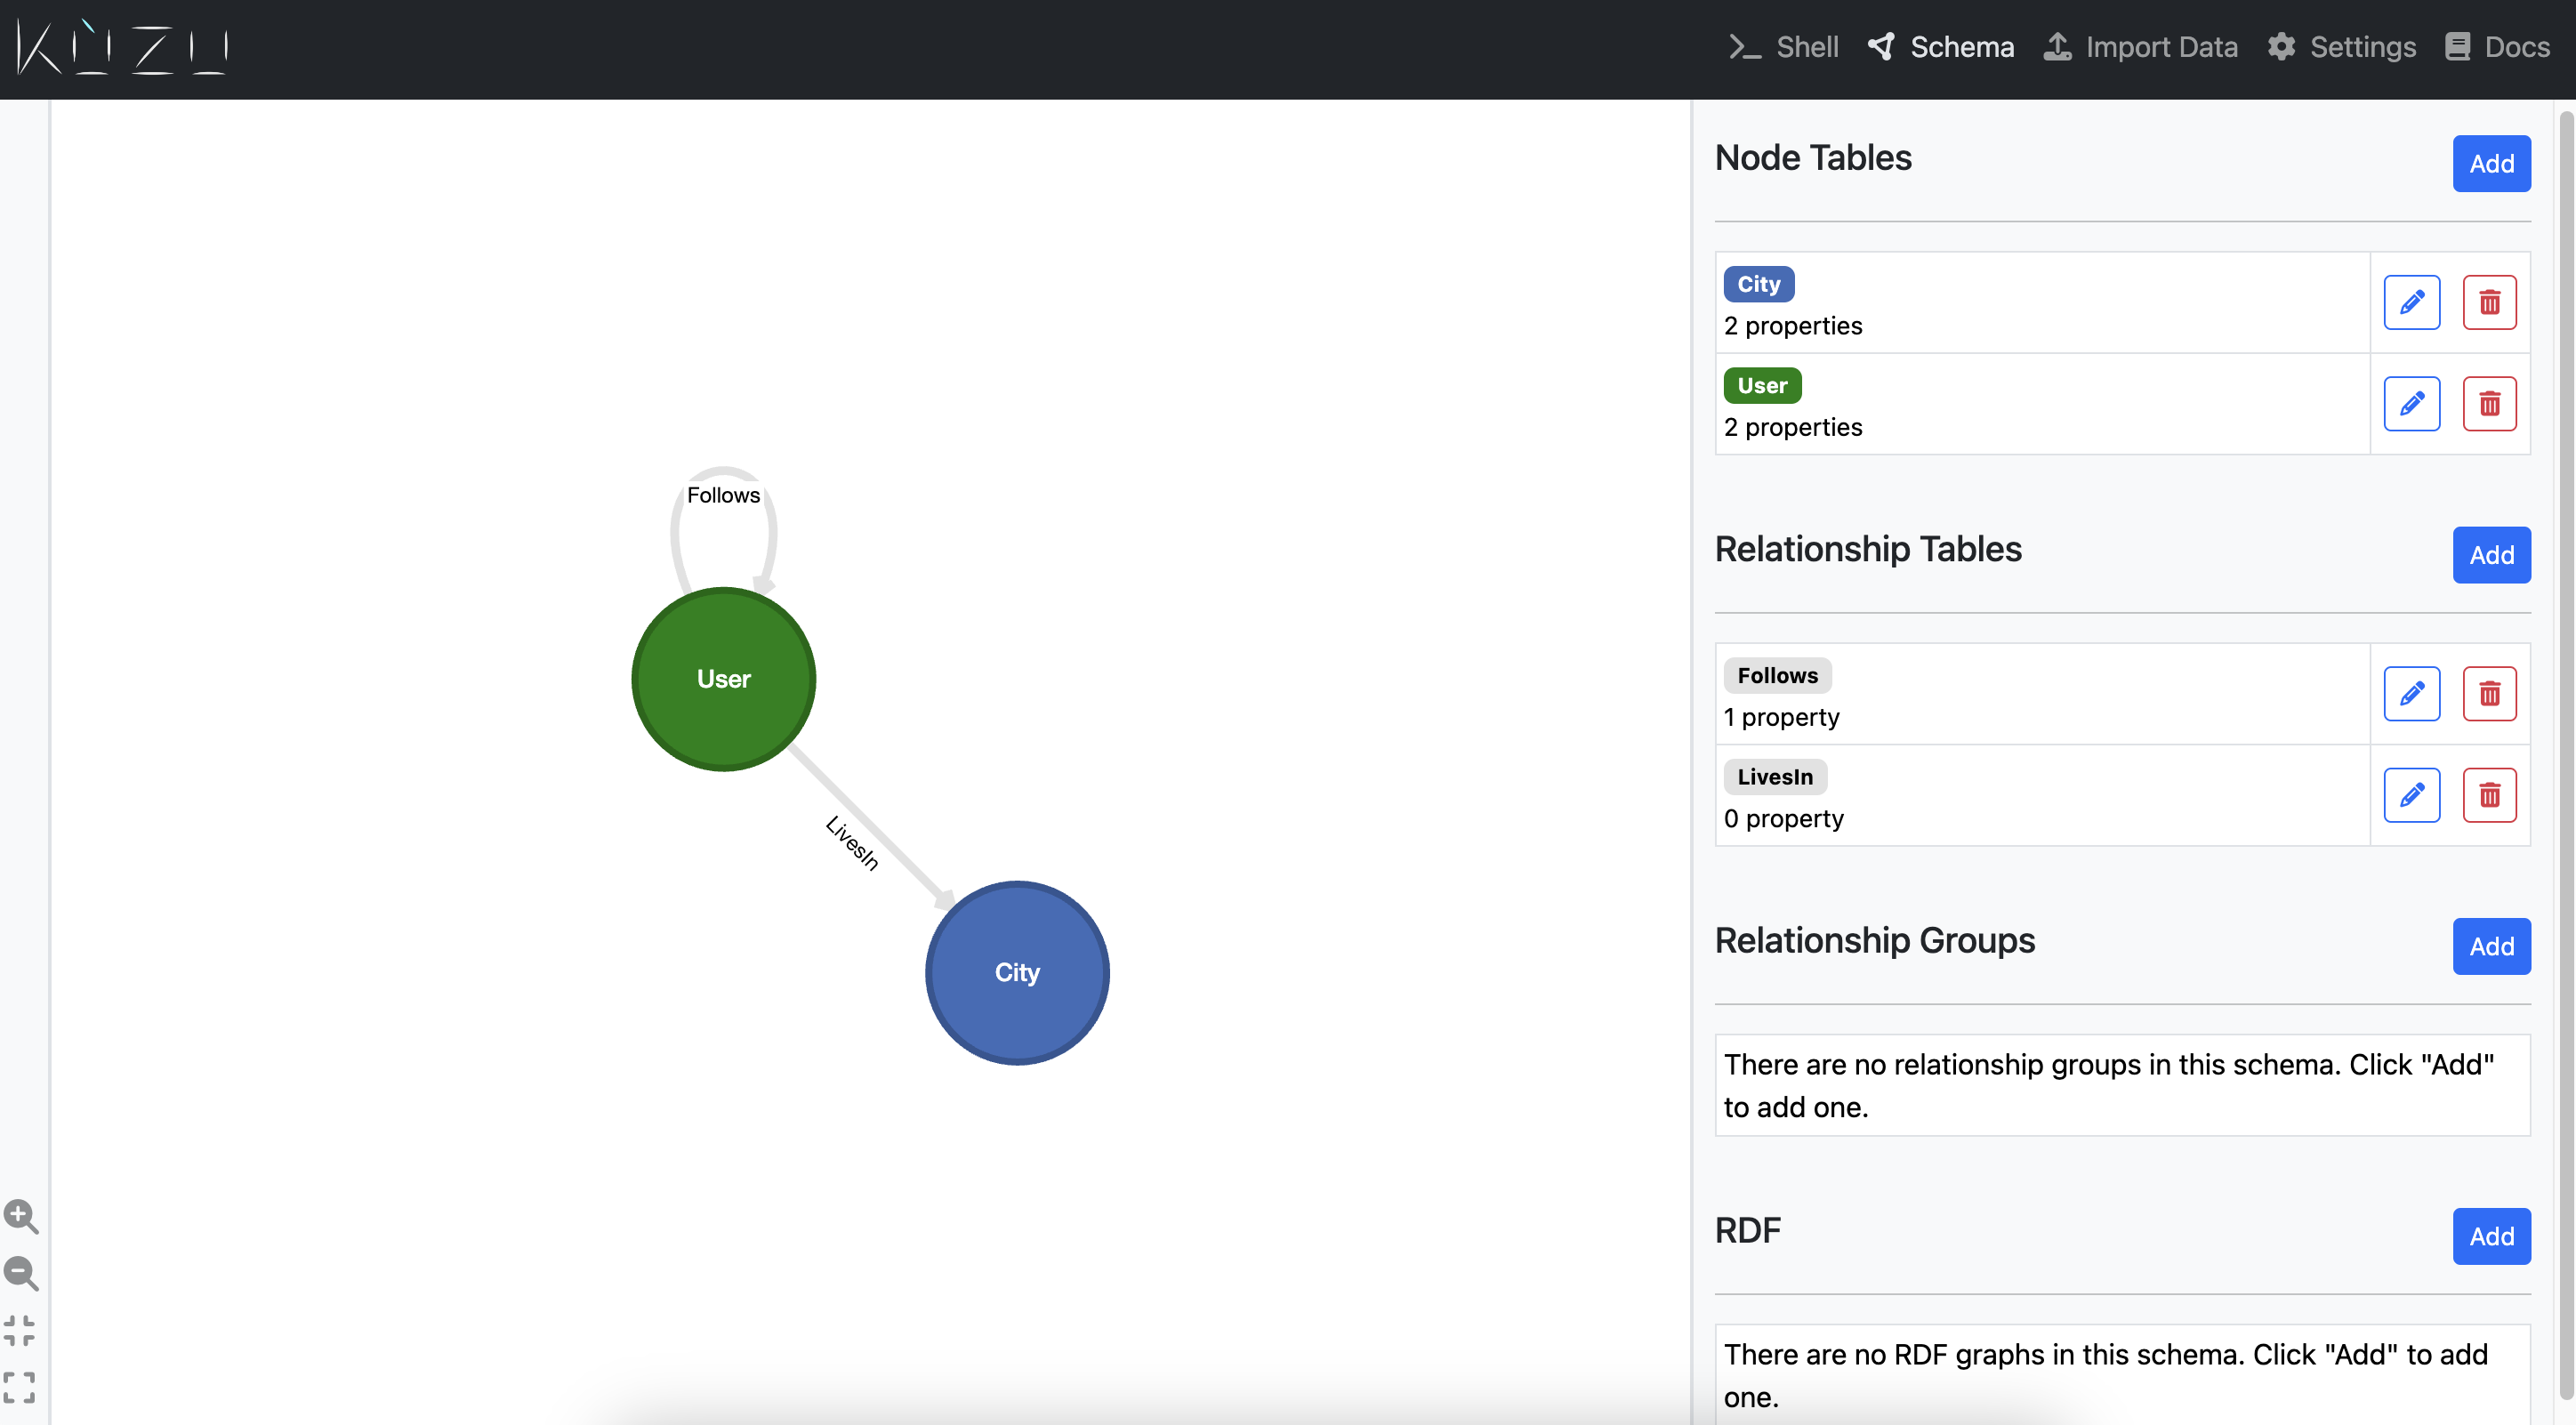
You can head over to the Schema tab to see the graph schema that was created from the imported data.
That’s it! You can now begin querying the data by heading over to the query editor in the shell panel.
Troubleshooting
Sometimes, you may encounter errors during the import process. The most common errors are due to
incorrectly specifying the order of the FROM and TO columns in the relationship files, and
issues with missing or duplicate primary keys in the data. The error messages during import should be
descriptive enough and point you to the source of the issue. The tables that were successfully
imported will be retained in the database, and you can retry the import after fixing the issues.
The following workflow should be helpful in completing the import process:
- Fix the underlying issue with the file that wasn’t correctly imported
- Re-import only the pending files that weren’t imported successfully into the import UI
- Set up the schema and import options as before
- Remember to choose “Use existing table” for the table that failed to import earlier
- Click on “Start Import” to re-import the data
- Verify that the data was imported successfully
If you continue to encounter issues that are hard to resolve with the above described import process, please reach out to us on Discord.